When users open a Power BI report from their devices, they want to extract business intelligence insights rapidly by allowing the visuals tell the story in a compelling and engaging manner that prompts a decision. The detail of how the Power BI report Viz. insights/story gets to their devices isn’t important to non-PBIX developers.
@Diana eDNA-Power BI challenge-3 showed this engaging side by producing a flipping report from summary, detail to trend that leaves report users and data Viz. enthusiasts with a strong experience.
Her submission –winner of eDNA- Power BI Challenge-3.
I have gone through the process of recreating the flipping effect on my environment to share with the eDNA- community what it takes to give users such experience. This journey made me understand that the designing process embeds style and context promptly reusable in other reports based on the experience the developer wants to display.
In turn, I’ll share the tricks and tips to create this experience, as I believe is nice to have in your PBIX designing toolbox. I’ll go through the PowerPoint Designing Process and provide you with some features I use to create customized icons and shapes.
You’ll be provided with the entire Ms PowerPoint and PBIX templates to assist in your redesigning process, you may adjust PPP to feed your reporting context or recreate directly in the PBIX environment – ‘my top-up’.
![]()
Flipping Sheets Design Process
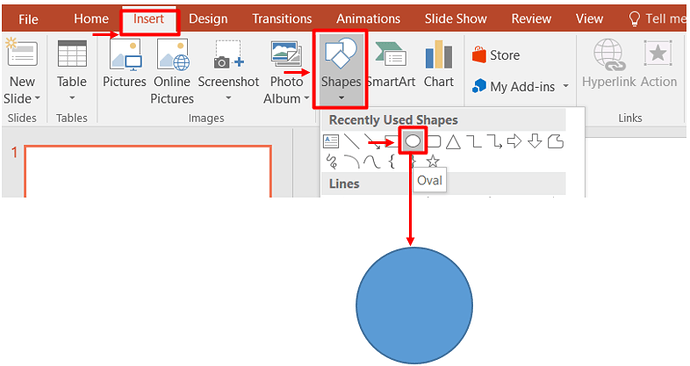
- Insert a shape
• Click ==>Insert ==>Shapes==>Oval
![]()
Adjust shape and color
• Highlight the oval shape, Click==> Format==>Shape fill
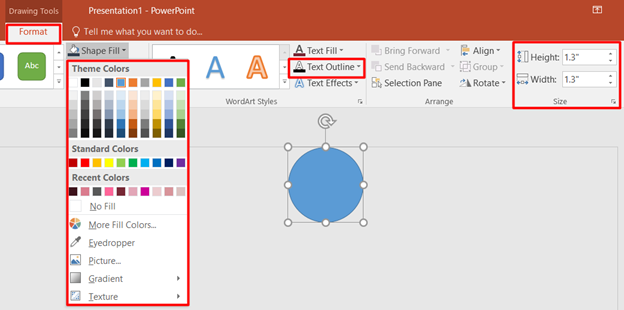
==>Set Text Outline to “No outline”
==>Adjust size (same height and width)
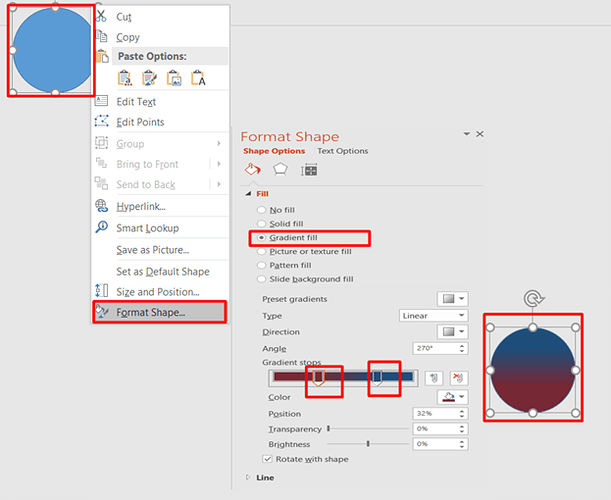
- Based on your unique feeling you may adjust the gradient :
Right click on the circle==>click format shape==>select gradient fill==>use the gradient stops to adjust==>the adjusted circle is on the bottom left
![]()
Fragment shapes (available only for Ms PowerPoint 2013+ - merge shapes is key to creating customized shapes and icons-)
- Shade the unwanted portion of the circle with any shape
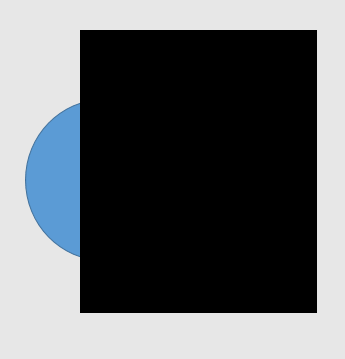
-
Hold the control key, click on both shapes –click on the circle first.
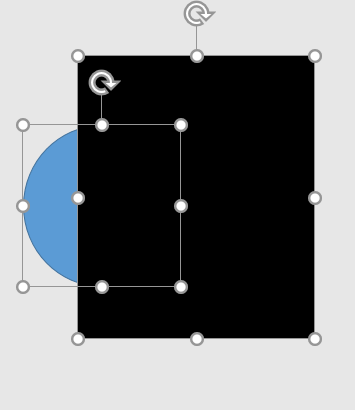
-
Click Format ==> Merge Shapes ==> Fragment (try the other possibilities as they are essential for creating customized shapes –combine, union, intersect, subtract )
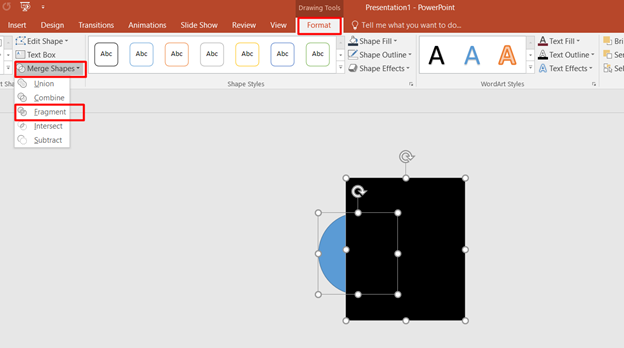
Click Format==> Fragment ( you will notice a change in the rectangle color since the circle is clicked first and vice-versa )
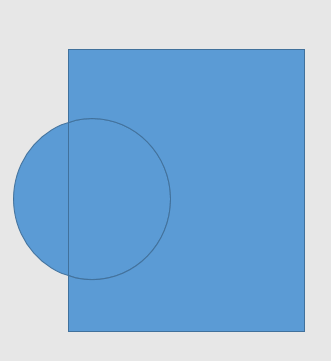
Dismantle fragments and select the ideal shape

- Reproduce shape and fill colors

![]()
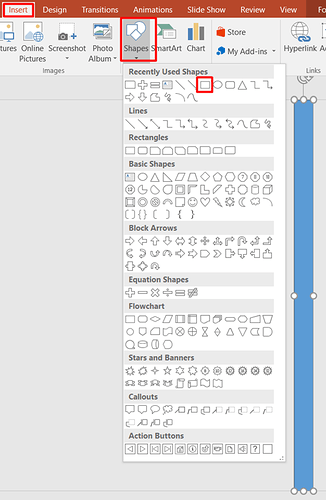
Designing the rectangular bars that amplifies the flipping effect ( Gradient is key)
- Click ==>Insert ==>Shapes==> Rectangle
- Right click on the rectangle ==>click format shape==>select gradient==>use the gradient stops to adjust==>you’ll find the adjusted rectangle at the extreme right
![]()
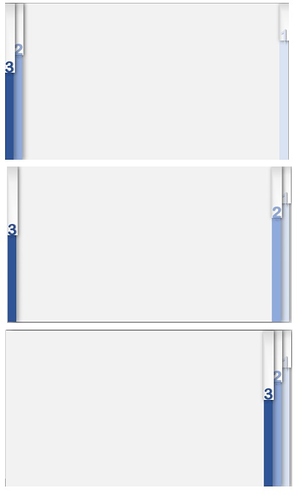
Designing the Flipping effect
- You’re now set to design using shapes in step 3 & 4 –collection of below.
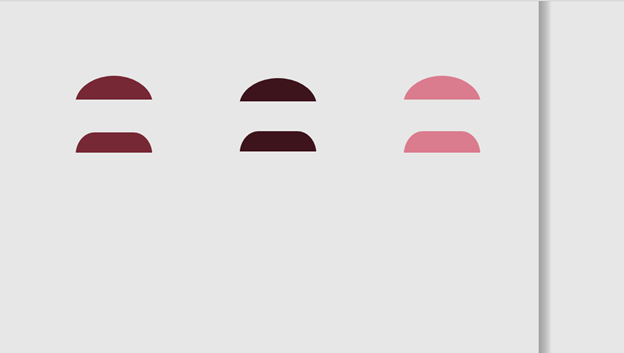

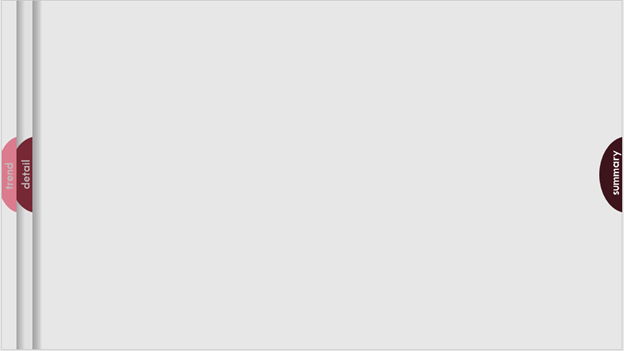

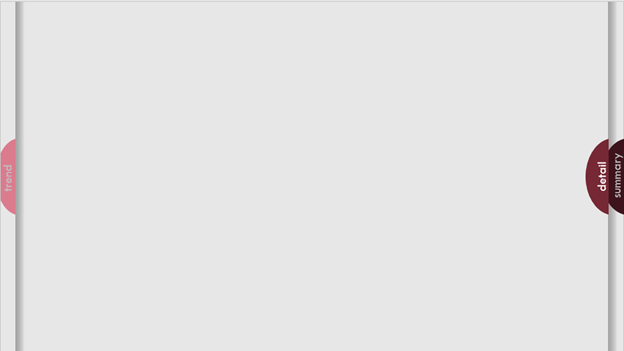


Attached:
- Ms PPP Deck - PBIX Flipping Sheets Design Process
PBIX Flipping Sheets Design Process.pptx (274.5 KB) - PBIX flipping sheet
PBIX Flipping Sheets.pbix (75.0 KB) - PBIX in-build bookmark version
PBIX Flipping Sheets In-build With Bookmarks.pbix (53.6 KB)
I’ll like to know your preference (remember to “Control” +”Enter” to feel the bookmark experience). If you like-thump up or leave a comment.
Thank you.
