Hello @butb0882,
Thank You for posting your query onto the Forum.
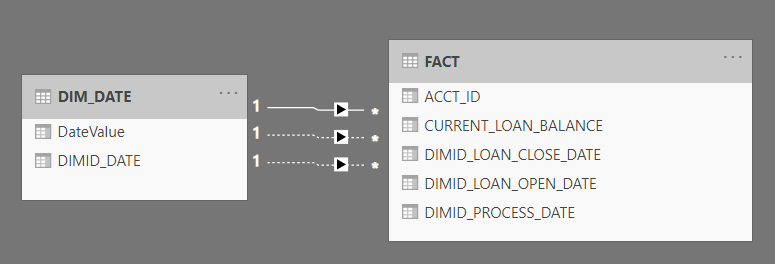
Well the first things first, we cannot perform time intelligence function on the DateValue. Those type of figures are there into the table just for sorting the Dates/ Month Name/Month & Year (depending upon the value). So in order to convert the "DIMID_LOAN_OPEN_DATE", “DIMID_LOAN_CLOSE_DATE” and “DIMID_PROCESS_DATE” columns into the actual “Date” I then exported the Fact data into the Excel file and then again loaded the Excel file into the Power BI in order to perform the transformations and convert the “DateValues” into the “Actual Date” fields.
Below are the steps performed to convert the “DateValue” into the “Actual Date”. Alongwith the screenshot provided for the reference - (Note: Also pay attention to “Applied Steps” section)
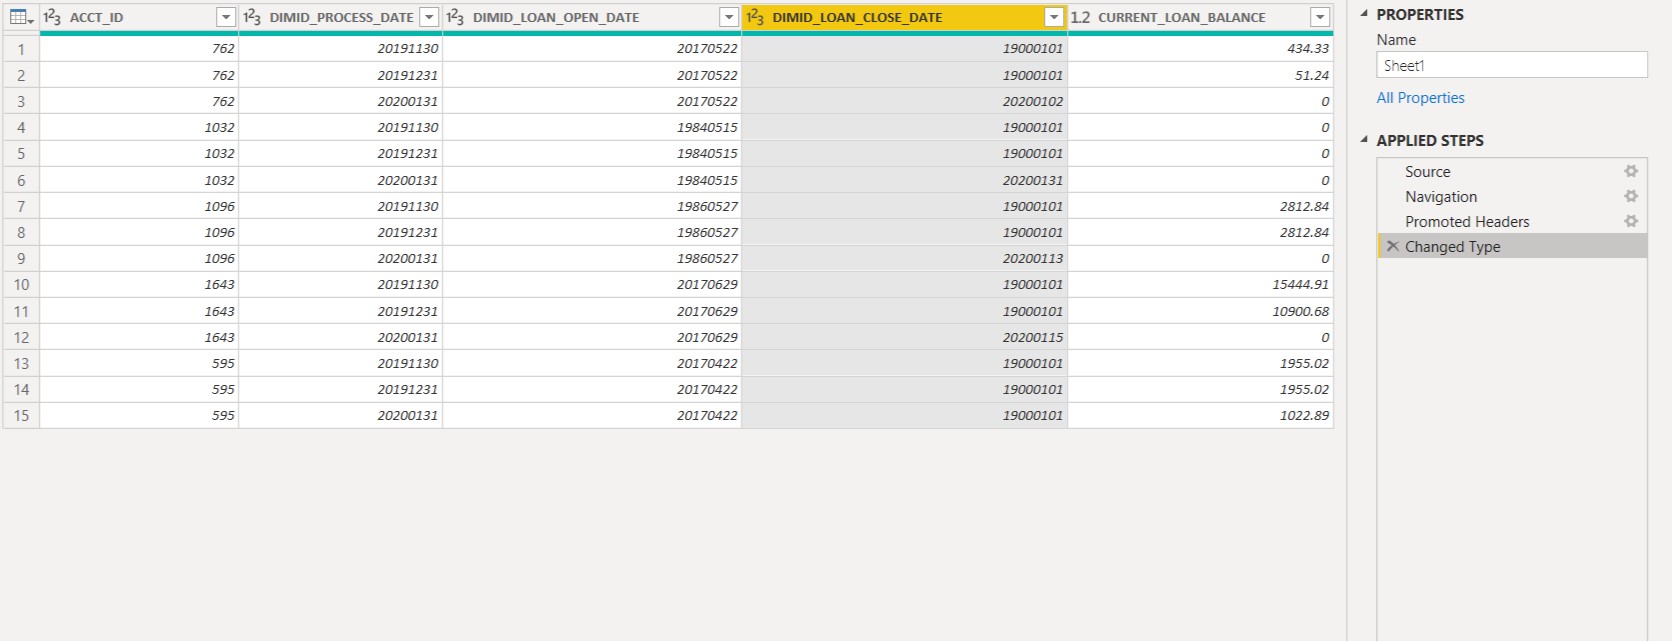
Step 1: Load the Fact data into the QueryEditor -
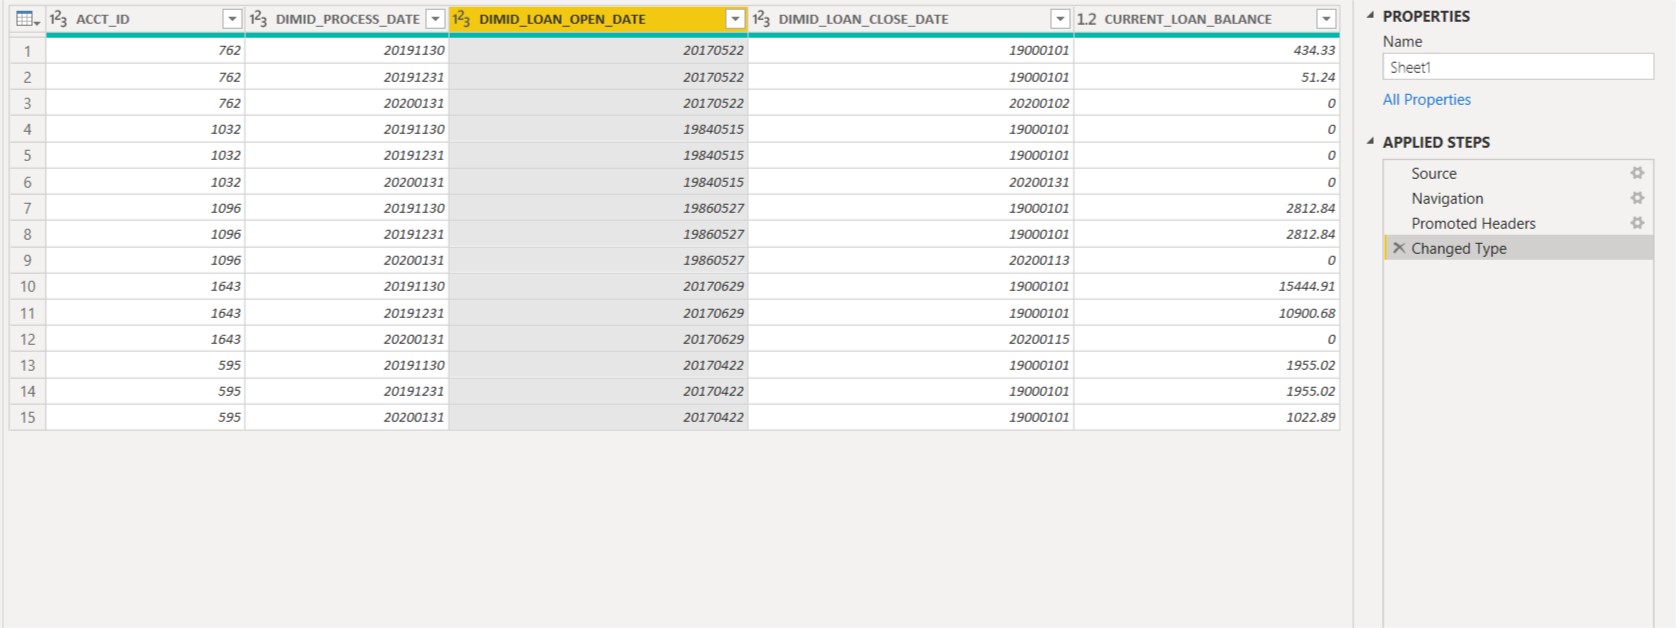
Step 2: Select the "DIMID_LOAN_OPEN_DATE" column by clicking on it.
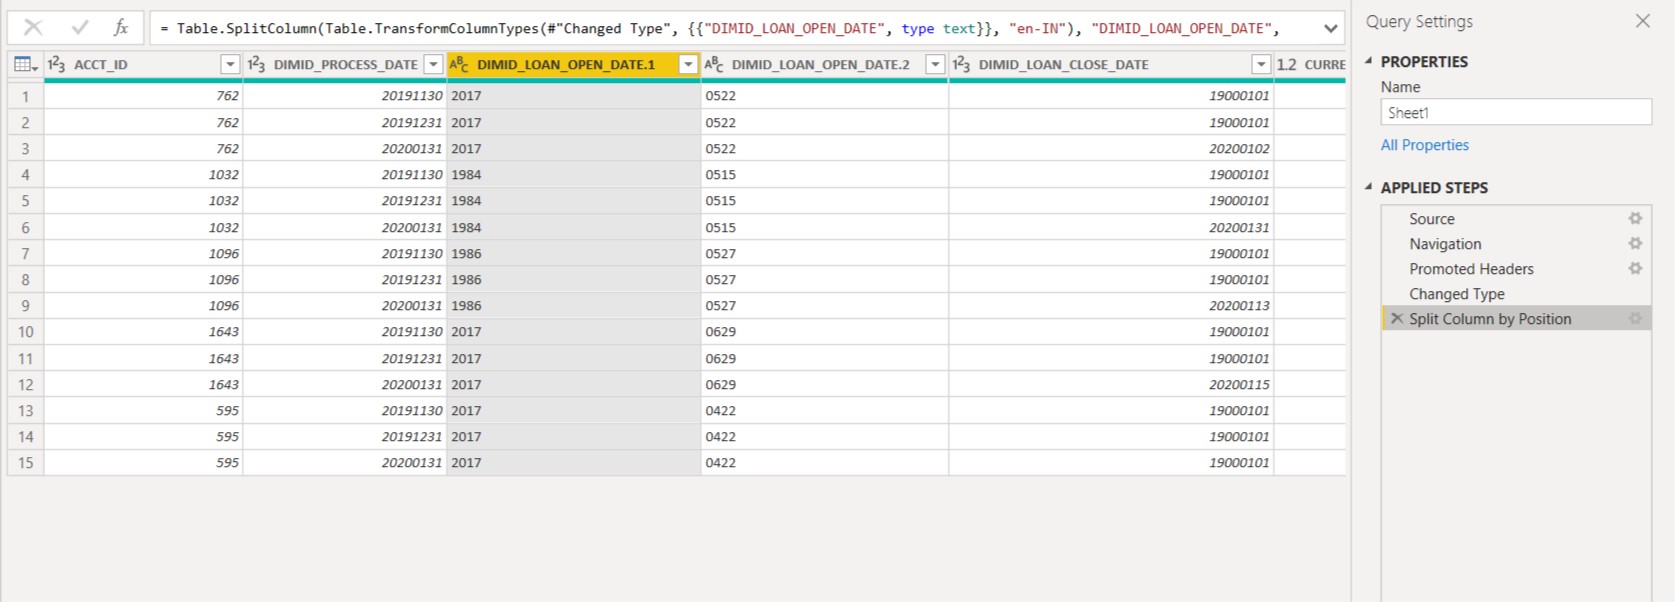
Step 3: Now, since the “DateValue” is in the “YYYYMMDD” format. We’ll split the column in 4-2-2- ratio. So first we’ll split 4 characters from the left side.
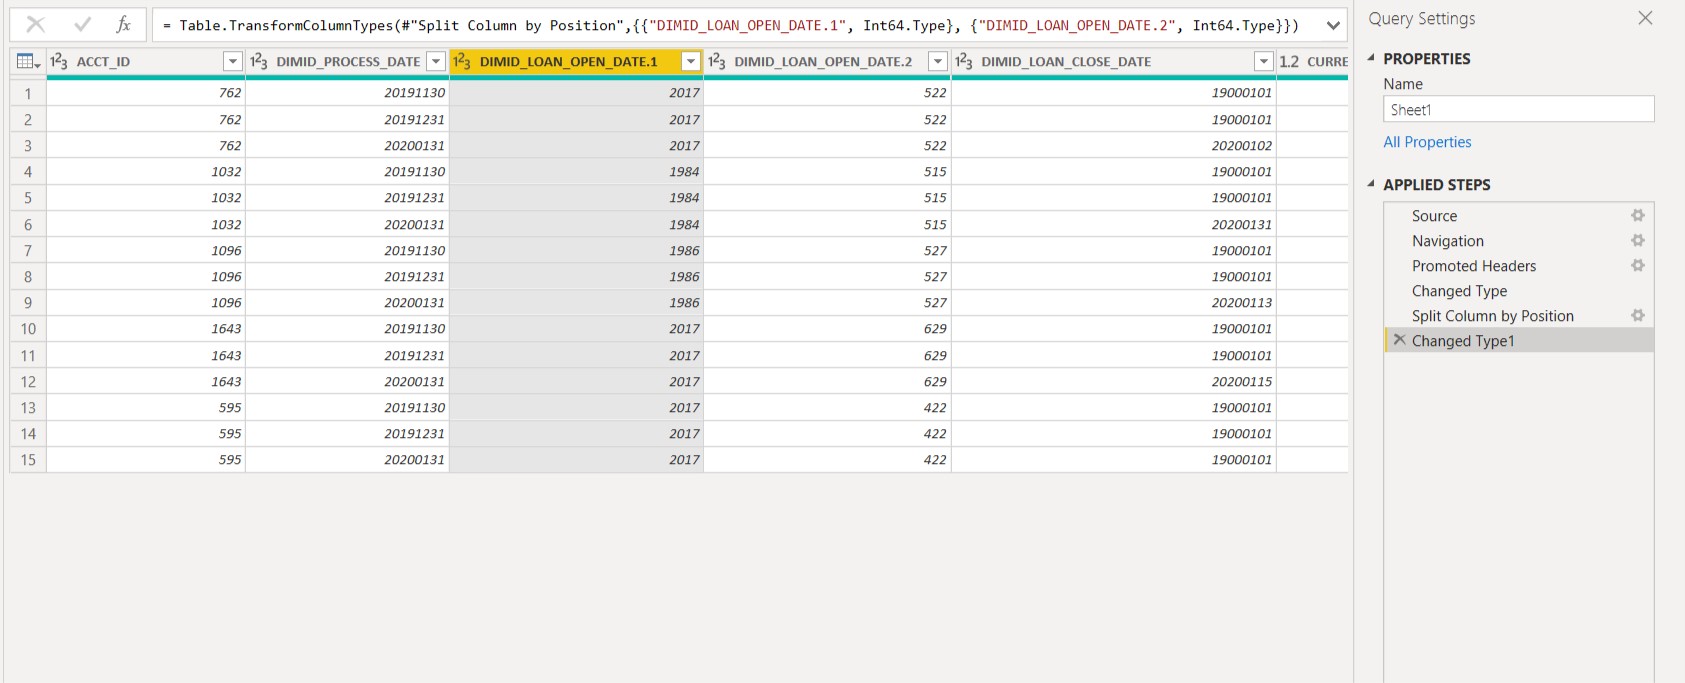
Step 4: Now, if you observe carefully into the “Applied Steps” section you’ll see that although we’d performed one action and that is splitting the column it also added an extra step of changing the type and therefore the leading zero’s (0) were eliminated from the DIMID_LOAN_OPEN_DATE.2 column.
Step 5: Cancel the “Changed Type1” step to bring back the leading zero’s (0). And now, you’ll observe that we’ve leading zero’s (0) into the DIMID_LOAN_OPEN_DATE.2 column.
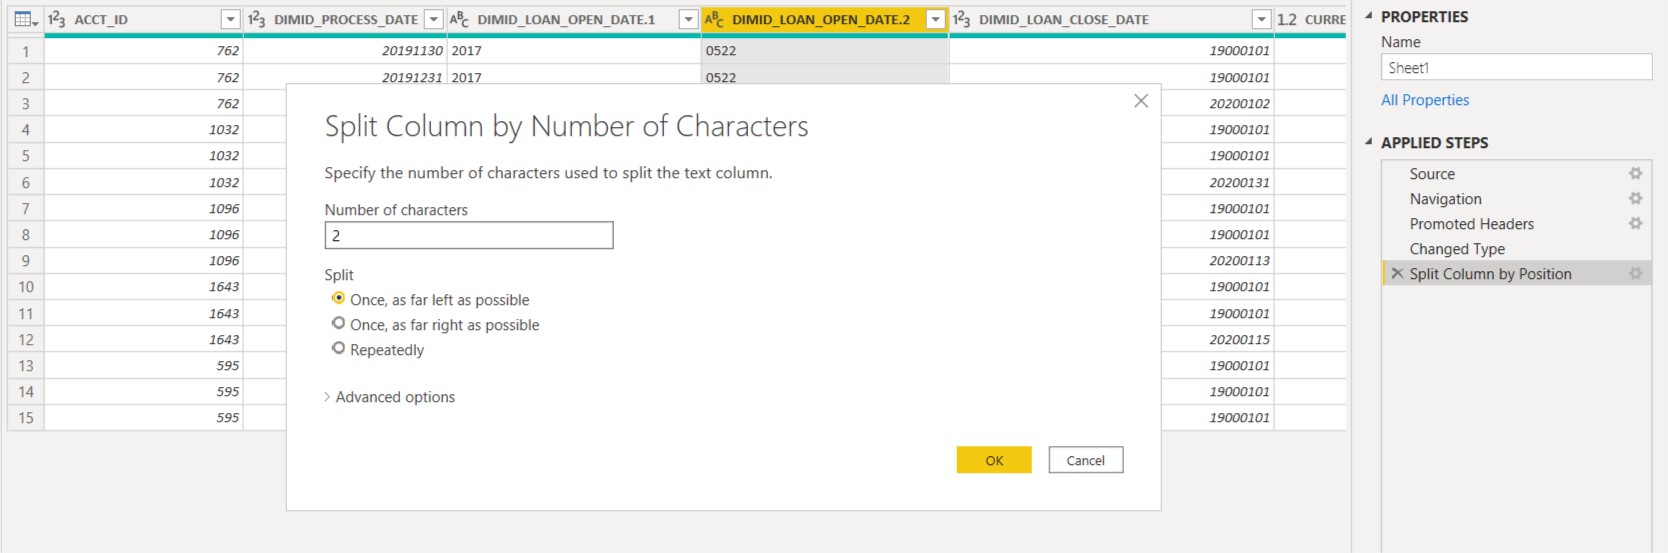
Step 6: Select the DIMID_LOAN_OPEN_DATE.2 column by clicking on it and then split the column by 2 characters.
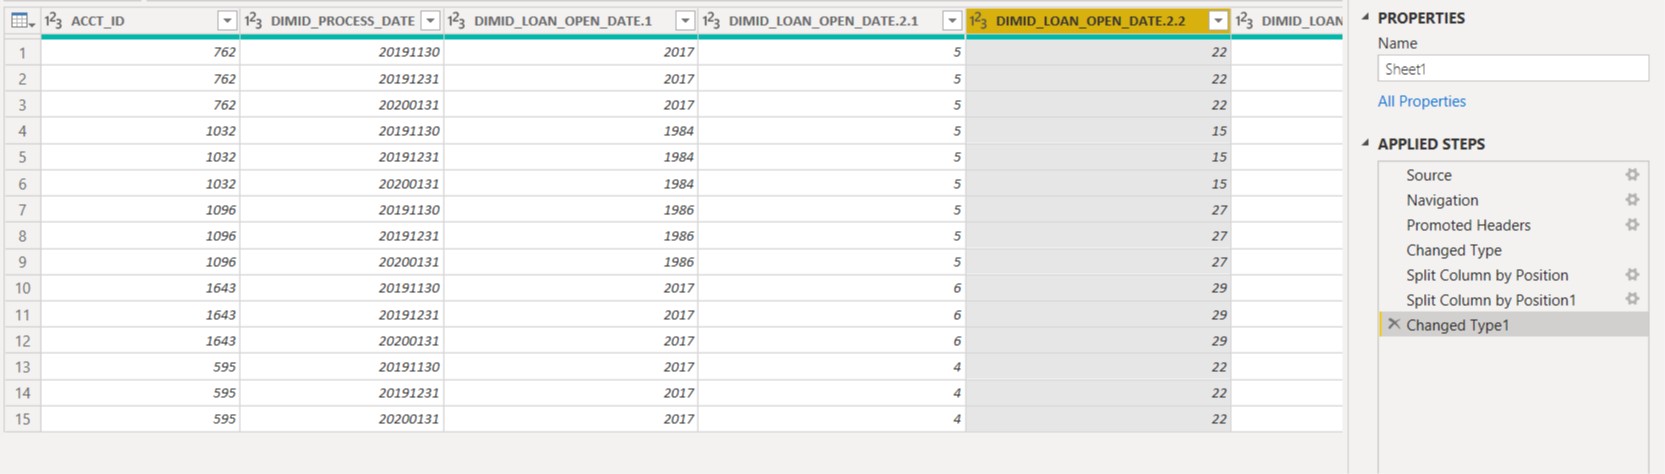
Step 7: Once we split the column DIMID_LOAN_OPEN_DATE.2. We’ll have in total 3 columns for Open Date i.e. DIMID_LOAN_OPEN_DATE.1, DIMID_LOAN_OPEN_DATE.2.1, DIMID_LOAN_OPEN_DATE.2.2.
Step 8; Again cancel the “Changed Type” step.
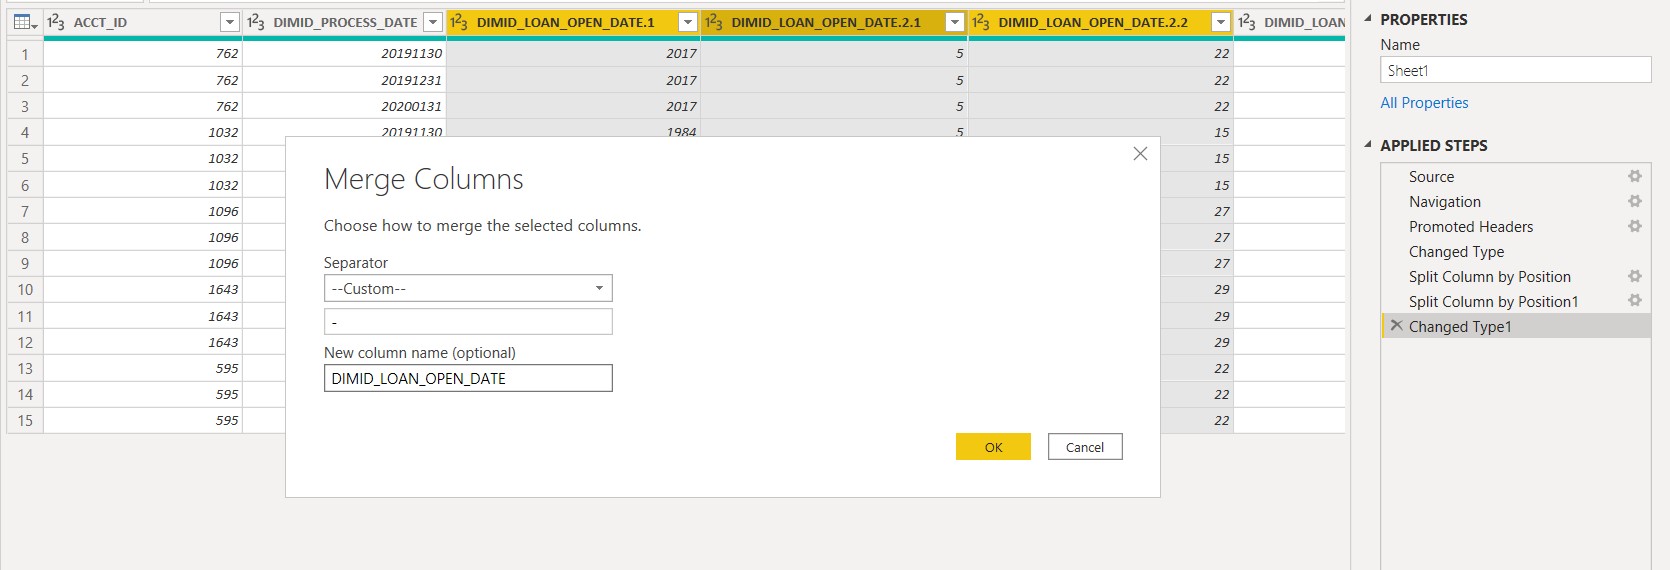
Step 9: Now, in order to convert this columns into the Date column i.e. in DD-MM-YYYY format. We’ll merge these 3 columns. So now, first select the DIMID_LOAN_OPEN_DATE.2.1, then DIMID_LOAN_OPEN_DATE.2.2 column and then DIMID_LOAN_OPEN_DATE.1 column.
Step 10: Right-click on any of the 3 selected columns and go to the “Merge Columns” section. And then choose the separator as “-” (Hypen) and name the column as DIMID_LOAN_OPEN_DATE
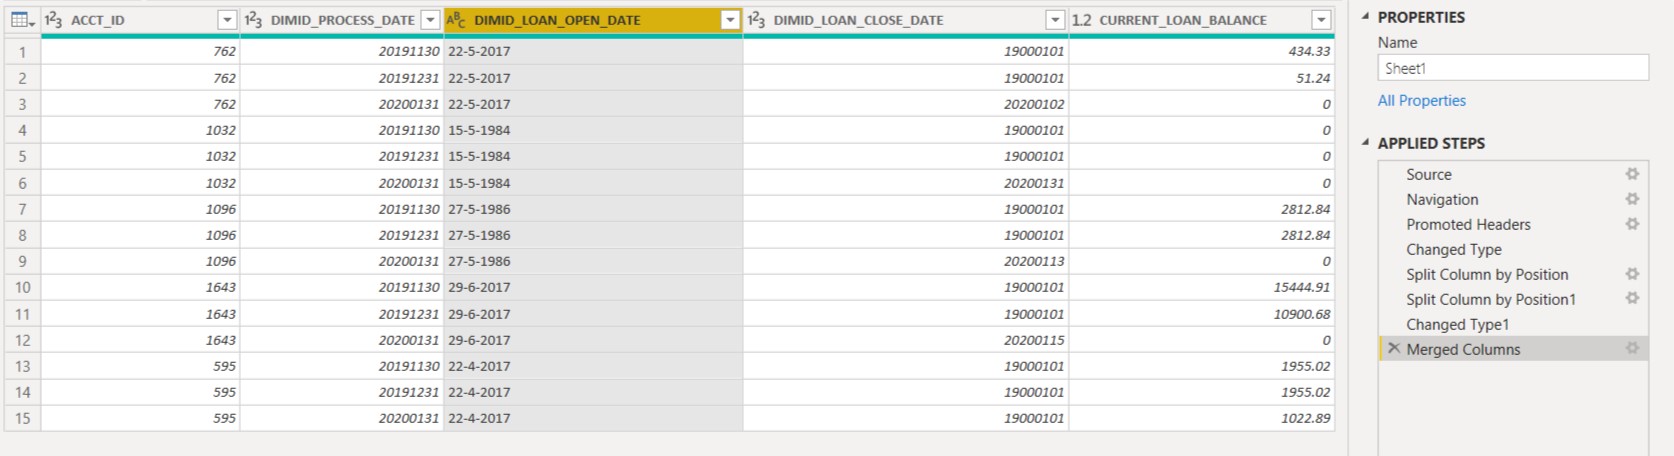
Step 11: You’ll observe that although the column has been converted into the “Date” but the format is still “TEXT”.
Step 12: Click onto the “ABC” next to the column name and change the format to “Date”. And you’ll observe that the figures will shift from left to right and the icon will change to the Calendar.
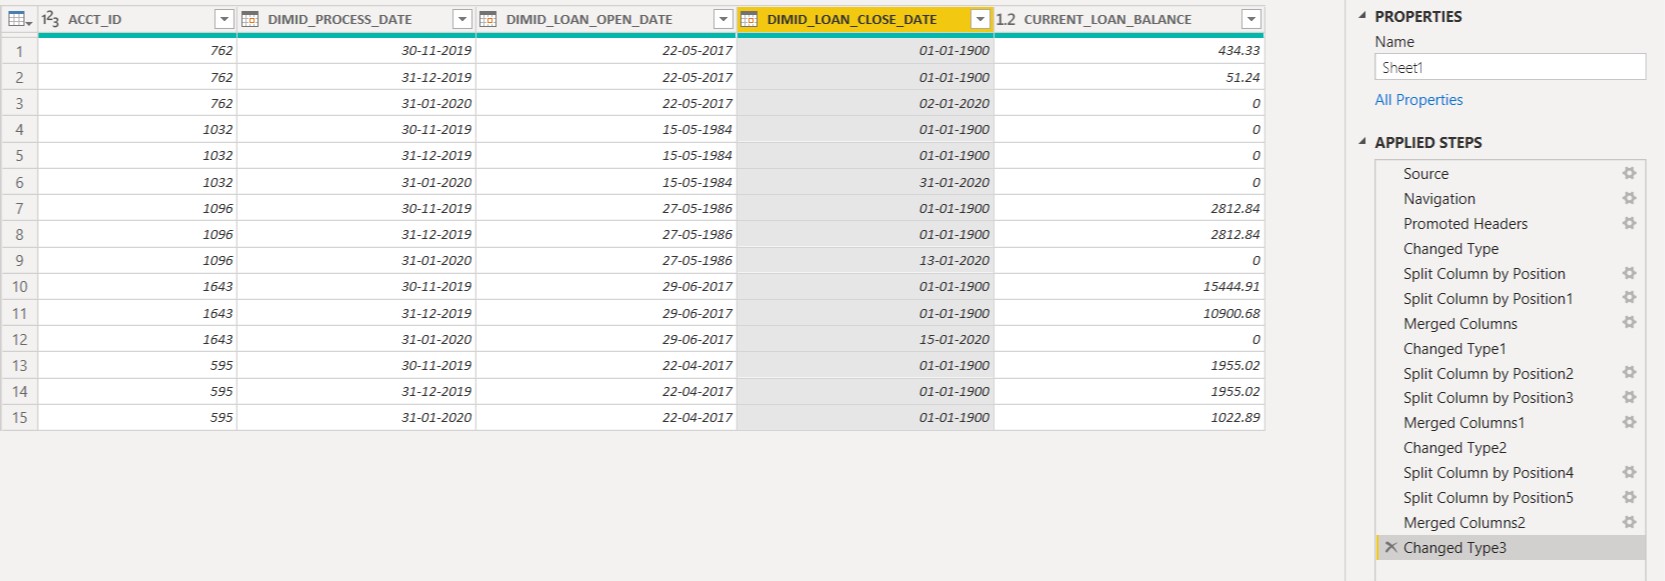
Follow the same steps to convert the “DIMID_PROCESS_DATE” as well as “DIMID_LOAN_CLOSE_DATE” columns. Below is the screenshots provided for the end result alongwith the transformations steps performed.
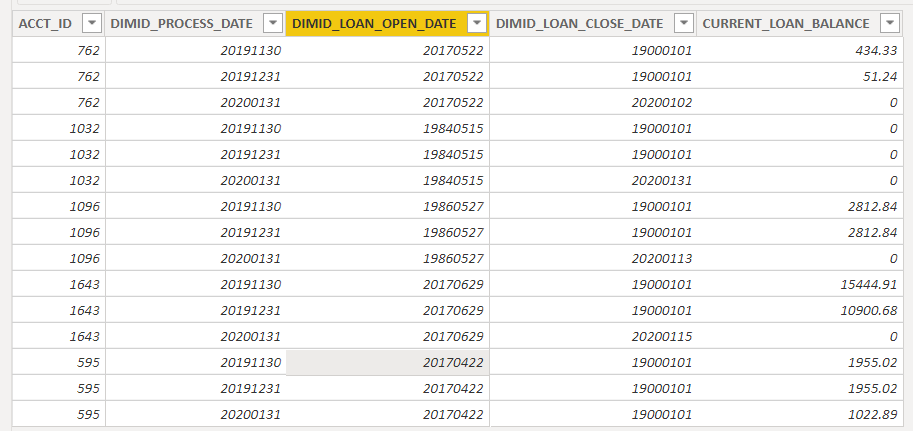
Now, this is where the Mystery Begins. If you observe carefully for some of the dates in the “Close Date” column dates back to 19th Century and that too “Close Date Year” is 1900 whereas the years under the “Process Date” and “Open Date” column for the first lines are 2019 and 2017 respectively. How can a Close Date be before the “Process Date” and “Open Date”? Below is the screenshot provided for the reference where the problems has occurred persistently.
So firstly, you’ll be required to correct your Date Values in order to proceed further with any of the analysis using Time Intelligence or Any Other Functions.
I’m also attaching the Excel as well as PBIX file of the working for the reference so that you can review the transformations steps as well as identify where the problem lies.
Hoping you find this useful. 
Thanks and Warm Regards,
Harsh
Loan Balance - Harsh.xlsx (9.2 KB)
PriorMonthBalance_CurrentMonthCloseDate - Harsh v1.pbix (29.5 KB)